Installation/模块安装
-----------------------
### Stable version/稳定版本
* Version/版本 : 2.6.1
* Release Date/发布日期 : 2023/05/21
```
pip install tkintertools==2.6.1
```
或者
```
pip install tkintertools
```
这个是目前的最新版,比较稳定,bug 没有那么多,推荐使用这个。
稳定版有文档可以查看,有 issue 我会去查看并尝试解决 issue。
### Development version/开发版本
* Version/版本 : 2.6.2
* Release Date/发布日期 : 2023/05/26
```
pip install tkintertools-dev==2.6.2
```
这个是作者正在开发的版本,有新功能,但不能保证稳定,bug 可能会比较多。
开发版本没有对应的文档,大家可以在 issue 中提出建议,我会适当采纳一些并在开发版本中更改或实现。
Description/模块说明
----------------------
tkintertools 是一款基于 tkinter 模块的二次开发的界面编程模块,它完全没有使用任何第三方模块和库的,同时,它也没有任何依赖包,它的功能完全由内置模块和函数实现,而且,它还是跨平台的!它和 tkinter 最大的不同在于,它的控件并非真实的控件,而是在 tkinter 模块中 Canvas 对象中绘制而成的,这就赋予了 tkintertools 控件一些在 tkinter 中没有的特性,列举如下:
* 控件背景可以是透明的(实际上是没有背景颜色)
* 控件的样式可以是自定义的(比如按钮有圆角)
* 控件的创建速度远大于 tkinter 的控件(除了 Canvas 控件)
但同时也产生了一些缺点:
* 虚拟的控件无法获取焦点
* 虚拟的控件在文本输入和显示的功能上存在一些缺陷(这个缺陷不是很明显,但强迫症就有点难受了,比如我)
tkintertools 模块还具有一些特色的功能:
* 利用 tkinter 和 tkintertools 创建的程序,在高分辨率的情况下,tkintertools 的会更加清晰(这点对于笔记本用户很友好,比如我)
* 可以迅速实现渐变色的效果
* 窗口缩放,所有的控件的大小跟着缩放(当然,也可以设置为不跟随缩放)
注意:需要 **Python3.7** 及更高版本才能运行 tkintertools!
Provides/模块功能
-------------------
Here, only the more distinctive features will be listed
这里只会列举出比较具有特色的功能
### Customizable widgets/可自定义的控件
tkintertools 模块的控件拥有许多参数供我们设置,比如圆角的半径、文本和边框以及控件内部的颜色,关联事件等等。
这里要说明的是,每个控件可以设置的关联事件不止一种,在鼠标经过控件时可以绑定事件,鼠标点击控件也可以,鼠标点击后松开也行等等。
文本和边框以及控件的填充色也是类似的,在鼠标经过控件、点击控件、点击后松开都可以设定颜色。
文本类控件还能够从右边逐步输入文本,文本输入提示符也可以不是单调无趣的竖线,可以是其他的,比如下划线等。
最后,大家可以看一下 [test.py](./test.py) 文件里面的示例,这个示例展示了 tkintertools 模块的绝大部分功能,示例中更有隐藏的 “多彩变幻” 彩蛋哦!
### Automatically control size/自动控制大小
tkintertools 中的控件,其大小和形状可以随着窗口的变化而成比例地变化,不仅仅是控件中的文本,Canvas 绘制的图形也会随之变动,更让人兴奋的是,png 类型的图片也会随之成比例地缩放!当然,你也可以设定参数让其不随之变动,也可以设定参数使其在缩放的时候保持横纵方向的比例。
总之,很方便,很舒适!
### Easily move widgets/轻松移动控件
见 [移动函数](#move)
### Gradient colors/渐变色
见 [颜色函数](#Gradient)
### Automatically adapt to DPI/自动适应DPI
见 [DPI 级别设置函数](#DPI)
### Detailed type hints/详细的类型提示
参考 [PEP 526](https://peps.python.org/pep-0526/)、[PEP 586](https://peps.python.org/pep-0586/)、[PEP 604](https://peps.python.org/pep-0604/) 和 [PEP 612](https://peps.python.org/pep-0612/),我采用了最兼容的方式去实现详细的类型提示,可适用 IDE 有 VScode、Pycharm 等。
那什么是类型提示呢?话不多说,直接看图就行:

在 VSCode 编辑器中,当鼠标移至类或者函数的名字上面时,会自动显示该类或者函数的注释文档。通过这种方式,不需要看太多的帮助文档和资料就能熟练地使用 tkintertools 模块!
### Across Platforms/跨平台
[test.py](./test.py) 在 Windows 系统(Windows10)上运行的界面如下:

[test.py](./test.py) 在 Linux 系统(Ubuntu22.04)上运行的界面如下:

Contents/模块内容
-------------------
Each non internal class and function in the module will be described in detail here
这里会详细说明模块中的每个非内部类和函数
### Container Widget/容器控件
1. `Tk`: 窗口类
继承于`tkinter.Tk`,在继承了`tkinter`模块内`Tk`的基础上,又加入了对`tkintertools`模块中的`Canvas`对象的支持,并加入了检测窗口大小是否缩放的机制,以使得其子`Canvas`均能正确地进行缩放
2. `Toplevel`: 顶级窗口类
继承于`tkinter.Toplevel`和`Tk`,加入了对`tkintertools`模块中的`Canvas`对象的支持,其余均与`Tk`一样
3. `Canvas`: 画布类
继承于`tkinter.Canvas`,加入了对画布虚拟控件的支持,同时是各类响应事件、缩放控制的管理者,也对`tkinter.Canvas`的实例方法有一定的兼容性
### Virtual Canvas Widget/虚拟画布控件
1. `Label`: 标签控件
标签控件的功能和`tkinter.Label`的功能类似,但更加的多元化
下面是`Label`控件的外观:

源代码
```python
import tkintertools as tkt
root = tkt.Tk('LabelTest', 1000, 400)
canvas = tkt.Canvas(root, 1000, 400, 0, 0)
def colorful(x, y, width, height): # type: (int, int, int, int) -> None
""" Gradient colors """
for i in range(width):
color = tkt.color(('#FF0000', '#0000FF'), i/width)
canvas.create_line(x+i, y, x+i, y+height, fill=color)
colorful(510, 175, 480, 150)
tkt.Label(canvas, 50, 50, 400, 100, text='NormalLabel\nHere is the text')
tkt.Label(canvas, 50, 200, 400, 100, radius=20, text='RoundCornerLabel')
tkt.Label(canvas, 550, 50, 400, 100, text='DisableLabel').set_live(False)
tkt.Label(canvas, 550, 200, 400, 100, radius=20,
text='TransparentLabel', color_fill=tkt.COLOR_NONE)
root.mainloop()
```
源代码
```python
import tkintertools as tkt
root = tkt.Tk('ButtonTest', 500, 500)
canvas = tkt.Canvas(root, 500, 500, 0, 0)
def colorful(x, y, width, height): # type: (int, int, int, int) -> None
""" Gradient colors """
for i in range(width):
color = tkt.color(('#FF0000', '#0000FF'), i/width)
canvas.create_line(x+i, y, x+i, y+height, fill=color)
colorful(50, 280, 400, 100)
tkt.Button(canvas, 150, 135, 200, 50, text='NormalButton')
tkt.Button(canvas, 100, 195, 300, 50, radius=10, text='RoundCornerButton')
tkt.Button(canvas, 150, 255, 200, 50, text='DisableButton').set_live(False)
tkt.Button(canvas, 100, 315, 300, 50, radius=10,
text='TransparentButton', color_fill=tkt.COLOR_NONE)
root.mainloop()
```
源代码
```python
import tkintertools as tkt
root = tkt.Tk('CheckButtonTest', 500, 300)
canvas = tkt.Canvas(root, 500, 300, 0, 0)
def colorful(x, y, width, height): # type: (int, int, int, int) -> None
""" Gradient colors """
for i in range(width):
color = tkt.color(('#FF0000', '#0000FF'), i/width)
canvas.create_line(x+i, y, x+i, y+height, fill=color)
colorful(40, 190, 420, 50)
tkt.CheckButton(canvas, 50, 50, 30, text='NormalCheckButton', value=True)
tkt.CheckButton(canvas, 50, 100, 30, text='DisableCheckButton',
value=True).set_live(False)
tkt.CheckButton(canvas, 50, 150, 30, radius=10, text='RoundCornerCheckButton')
tkt.CheckButton(canvas, 50, 200, 30, radius=15,
text='TransparentCheckButton', color_fill=tkt.COLOR_NONE)
root.mainloop()
```
源代码
```python
import tkintertools as tkt
root = tkt.Tk('EntryTest', 500, 400)
canvas = tkt.Canvas(root, 500, 400, 0, 0)
def colorful(x, y, width, height): # type: (int, int, int, int) -> None
""" Gradient colors """
for i in range(width):
color = tkt.color(('#FF0000', '#0000FF'), i/width)
canvas.create_line(x+i, y, x+i, y+height, fill=color)
colorful(50, 193, 400, 100)
tkt.Entry(canvas, 20, 20, 200, 30, text=('LeftEntry', 'Enter'))
tkt.Entry(canvas, 20, 55, 200, 30, text=(
'CenterEntry', 'Enter'), justify='center')
tkt.Entry(canvas, 20, 90, 200, 30, text=(
'RightEntry', 'Enter'), justify='right')
tkt.Entry(canvas, 270, 20, 200, 30, radius=8, text='LeftEntry')
tkt.Entry(canvas, 270, 55, 200, 30, radius=8,
text='CenterEntry', justify='center')
tkt.Entry(canvas, 270, 90, 200, 30, radius=8,
text='RightEntry', justify='right')
tkt.Entry(canvas, 100, 150, 300, 35, text=('PasswordEntry',
'Click To Enter'), justify='center', show='●')
tkt.Entry(canvas, 100, 200, 300, 35, text='DisableEntry',
justify='center').set_live(False)
tkt.Entry(canvas, 100, 250, 300, 35, text='TransparentEntry',
justify='center', color_fill=tkt.COLOR_NONE)
root.mainloop()
```
源代码
```python
import tkintertools as tkt
root = tkt.Tk('TextTest', 1000, 400)
canvas = tkt.Canvas(root, 1000, 400, 0, 0)
def colorful(x, y, width, height) -> None: # type: (int, int, int, int) -> None
""" Gradient colors """
for i in range(width):
color = tkt.color(('#FF0000', '#0000FF'), i/width)
canvas.create_line(x+i, y, x+i, y+height, fill=color)
colorful(510, 175, 480, 150)
tkt.Text(canvas, 50, 50, 400, 100, text=('NormalText(Left)', 'Click To Enter'))
tkt.Text(canvas, 50, 200, 400, 100, radius=20,
text='RoundCornerText(Center)', justify='center')
tkt.Text(canvas, 550, 50, 400, 100, text='DisableText').set_live(False)
tkt.Text(canvas, 550, 200, 400, 100, radius=20,
text='TransparentText(Right)', justify='right', color_fill=tkt.COLOR_NONE)
root.mainloop()
```
源代码
```python
import tkintertools as tkt
root = tkt.Tk('ProgressbarTest', 500, 500)
canvas = tkt.Canvas(root, 500, 500, 0, 0)
def colorful(x, y, width, height) -> None: # type: (int, int, int, int) -> None
""" Gradient colors """
for i in range(width):
color = tkt.color(('#FF0000', '#0000FF'), i/width)
canvas.create_line(x+i, y, x+i, y+height, fill=color)
colorful(30, 290, 440, 50)
tkt.Progressbar(canvas, 50, 50, 400, 30)
tkt.Progressbar(canvas, 50, 100, 400, 30).load(.6667)
tkt.Progressbar(canvas, 50, 150, 400, 30, borderwidth=5).load(1)
(_ := tkt.Progressbar(canvas, 50, 200, 400, 30)).load(0.3333)
_.set_live(False)
tkt.Progressbar(canvas, 50, 250, 400, 30, color_bar=(
'lightyellow', 'skyblue')).load(.5)
tkt.Progressbar(canvas, 50, 300, 400, 30, color_bar=('', 'orange')).load(.1667)
progressbar = tkt.Progressbar(canvas, 50, 375, 400, 30)
progressbar_2 = tkt.Progressbar(canvas, 50, 425, 400, 30)
def load(total, count=0): # type: (int, int) -> None
""" load progressbar """
progressbar.load(count/total)
progressbar_2.load(1-count/total)
if count < total:
root.after(3, load, total, count+1)
load(10000)
root.mainloop()
```
源代码
```python
import tkintertools as tkt
root = tkt.Tk('MoveTest', 500, 500)
canvas = tkt.Canvas(root, 500, 500, 0, 0)
rect = canvas.create_rectangle(50, 350, 150, 450)
def move_window(switch=[True]): # type: (list[bool]) -> None
tkt.move(root, None, 1000 if switch[0] else -1000, 0, 800, mode='flat')
switch[0] = not switch[0]
def move_button(switch=[True]) -> None: # type: (list[bool]) -> None
tkt.move(canvas, button, 200 if switch[0]
else -200, 0, 500, mode='rebound')
switch[0] = not switch[0]
def move_rect(switch=[True]): # type: (list[bool]) -> None
tkt.move(canvas, rect, 200 if switch[0] else -200, 0, 500, mode='smooth')
switch[0] = not switch[0]
tkt.Button(canvas, 50, 50, 200, 40, radius=10,
text='MoveWindow', command=move_window)
tkt.Button(canvas, 50, 100, 200, 40, radius=10,
text='MoveRect', command=move_rect)
button = tkt.Button(canvas, 50, 150, 200, 40, radius=10,
text='MoveButton', command=move_button)
root.mainloop()
```
    `left`   : "tkintertools        "
    `center` : "    tkintertools    "
    `right`  : "        tkintertools"
3. `color`: 颜色函数
颜色函数可以轻松求出一个颜色到另外一个颜色的过渡颜色,因此可以轻松得到渐变色的效果,同时,改变传入的参数还可以得到传入颜色的对比色
第二张图是 test.py 在图像测试中绘制的图案


源代码
```python
import tkintertools as tkt
root = tkt.Tk('ColorTest', 500, 500)
canvas = tkt.Canvas(root, 500, 500, 0, 0)
def colorful(x, y, width, height): # type: (int, int, int, int) -> None
""" Gradient colors """
for i in range(width):
color = tkt.color(('#FF0000', '#00FF00'), i/width)
color_2 = tkt.color(('#FFFFFF', '#000000'), i/width)
canvas.create_line(x+i, y, x+i, y+height, fill=color)
canvas.create_oval(250-i/3, 300-i/3, 250+i/3, 300 +
i/3, outline=color_2, width=2)
colorful(50, 50, 400, 100)
root.mainloop()
```

5. `SetProcessDpiAwareness`: DPI 级别设置函数
这个函数实际上只是对函数`ctypes.WinDLL('shcore').SetProcessDpiAwareness`的一个简单包装,其值可为 0、1 和 2,分别代表程序 DPI 的不同级别,那么缩放效果也就不同,`tkintertools`选择的值是 1,但程序默认值实际为 0
下面是未执行这个函数的效果

下面是执行了这个函数的效果

从上面的两张图中可以很明显的看出第一张很模糊,第二张很清晰,这就是 DPI 级别不同的原因,不过这一点在屏幕缩放比不是 100% 的时候才会出现
大家对上面的图肯定很熟悉,这不就是 IDLE 吗!?对,这个的问题的解决办法也是来自于 IDLE 的源代码 [pyshell.py line 18~20]
注意:该函数在程序的不同位置执行的效果不一样!一般用在`mainloop`之前,但`tkintertools`已经在`mainloop`函数中嵌入了该函数,无需再设置一次 DPI 级别,此函数是为了原生`tkinter`程序用的。
Examples/实战示例
----------------
以下三个为使用了 tkintertools 的典型案例,供大家参考,程序均免费,源代码开放!
前面两个是我一边改进 tkintertools 模块,一边写的实战,有一定的 bug,但不影响正常使用。
只有把模块真正地用到实战上去,才知道哪有 bug,哪里还需要改进!
### 任务清单小工具
* 文章链接: https://xiaokang2022.blog.csdn.net/article/details/128561339
* 代码仓库: https://gitcode.net/weixin_62651706/todolist
* 程序下载(含打包好的程序和源代码): https://wwc.lanzoum.com/iyxL30kpkcbe
* 推荐指数: 👍
这个案例使用了 tkintertools-v2.5.7 版本(新版已无法兼容),含有一些 bug,大量采用了 tkintertools 的控件,取得了比较好的界面效果。体现了 tkintertools 模块与 tkinter 模块相比在颜值上的碾压性!

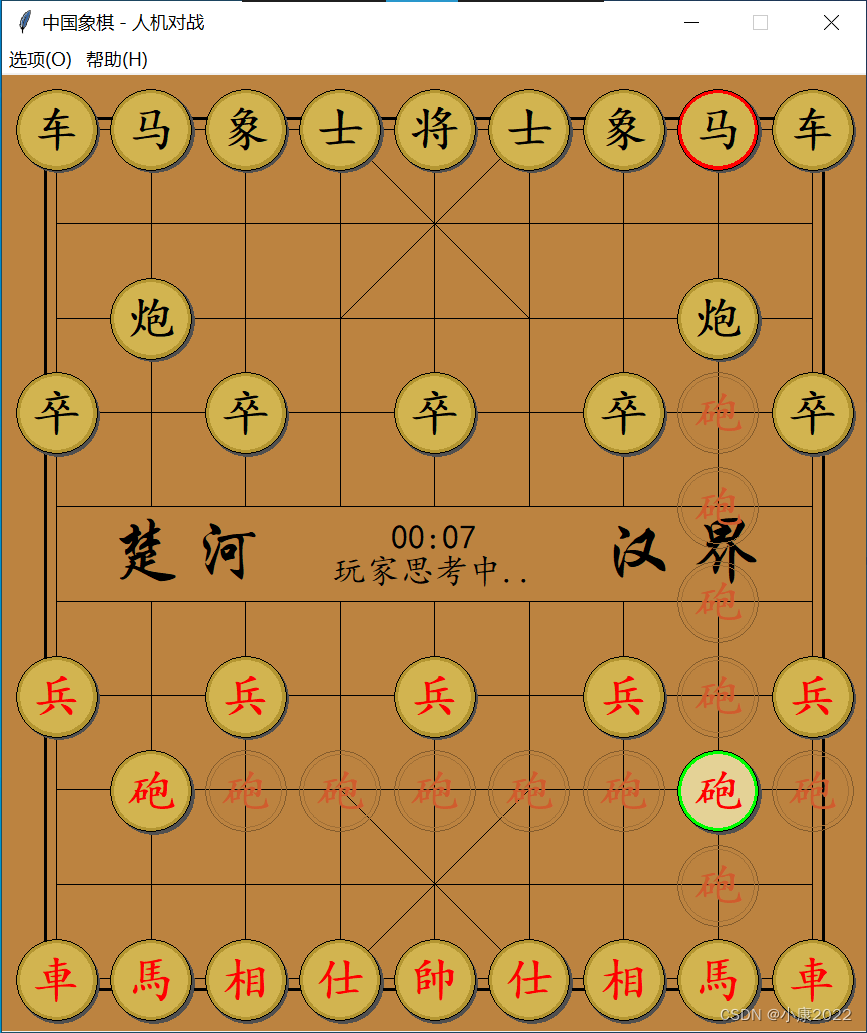
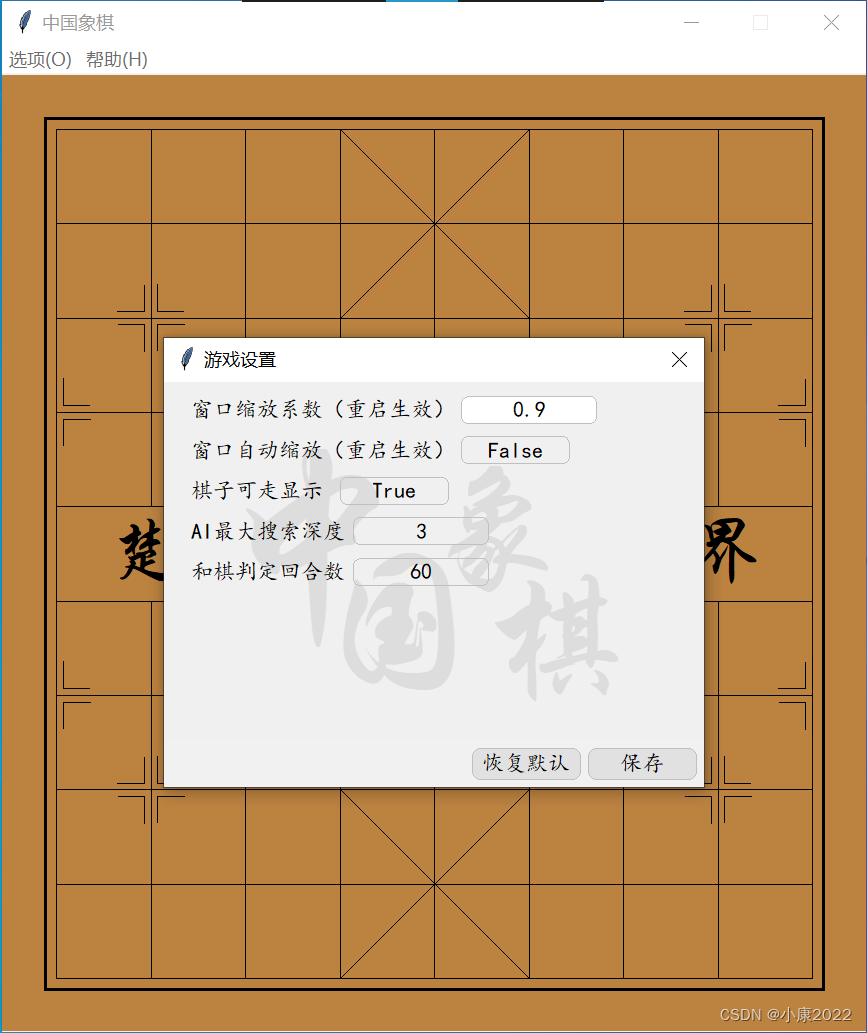
### 中国象棋游戏
* 文章链接: https://xiaokang2022.blog.csdn.net/article/details/128852029
* 代码仓库: https://gitcode.net/weixin_62651706/chess
* 程序下载(含打包好的程序和源代码): https://wwc.lanzoum.com/iwgp00mlewpa
* 推荐指数: 👍👍
注意:源代码有解压密码,解压密码在链接文章中,请仔细查找!
这个案例使用了 tkintertools-v2.5.9.5 版本(新版已无法兼容), 含有少量 bug,部分 UI 采用了 tkintertools,部分 UI 采用了 tkinter,属于混合使用。体现了 tkintertools 模块对 tkinter 模块的兼容性!
### 简易登录界面
* 文章链接: 暂无
* 代码仓库: https://gitcode.net/weixin_62651706/tester
* 程序下载: 暂无
* 推荐指数: 👍👍👍
这个案例使用了最新稳定版的 tkintertools-v2.6.0,界面非常稳定,几乎没有 bug,完全采用 tkintertools 的控件,颜值很高,界面非常流畅。体现了 tkintertools 模块与 tkinter 模块相比在性能上的优越性!


More/更多
---------
> GitCode:
> https://gitcode.net/weixin_62651706/tkintertools
> GitHub(Mirror/镜像):
> https://github.com/XiaoKang2022-CSDN/tkintertools
> Column/专栏:
> https://blog.csdn.net/weixin_62651706/category_11600888.html
还有更多内容请在 [源代码](./tkintertools/) 中探索!
