[简体中文](DetAnnoTools.md) | English
# Object Detection Annotation Tools
## Concents
[LabelMe](#LabelMe)
* [Instruction](#Instruction-of-LabelMe)
* [Installation](#Installation)
* [Annotation of Images](#Annotation-of-images-in-LabelMe)
* [Annotation Format](#Annotation-Format-of-LabelMe)
* [Export Format](#Export-Format-of-LabelMe)
* [Summary of Format Conversion](#Summary-of-Format-Conversion)
* [Annotation file(json)—>VOC Dataset](#annotation-filejsonvoc-dataset)
* [Annotation file(json)—>COCO Dataset](#annotation-filejsoncoco-dataset)
[LabelImg](#LabelImg)
* [Instruction](#Instruction-of-LabelImg)
* [Installation](#Installation-of-LabelImg)
* [Installation Notes](#Installation-Notes)
* [Annotation of images](#Annotation-of-images-in-LabelImg)
* [Annotation Format](#Annotation-Format-of-LabelImg)
* [Export Format](#Export-Format-of-LabelImg)
* [Notes of Format Conversion](#Notes-of-Format-Conversion)
## [LabelMe](https://github.com/wkentaro/labelme)
### Instruction of LabelMe
#### Installation
Please refer to [The github of LabelMe](https://github.com/wkentaro/labelme) for installation details.
Ubuntu
```
sudo apt-get install labelme
# or
sudo pip3 install labelme
# or install standalone executable from:
# https://github.com/wkentaro/labelme/releases
```
macOS
```
brew install pyqt # maybe pyqt5
pip install labelme
# or
brew install wkentaro/labelme/labelme # command line interface
# brew install --cask wkentaro/labelme/labelme # app
# or install standalone executable/app from:
# https://github.com/wkentaro/labelme/releases
```
We recommend installing by Anoncanda.
```
conda create –name=labelme python=3
conda activate labelme
pip install pyqt5
pip install labelme
```
#### Annotation of Images in LabelMe
After starting labelme, select an image or an folder with images.
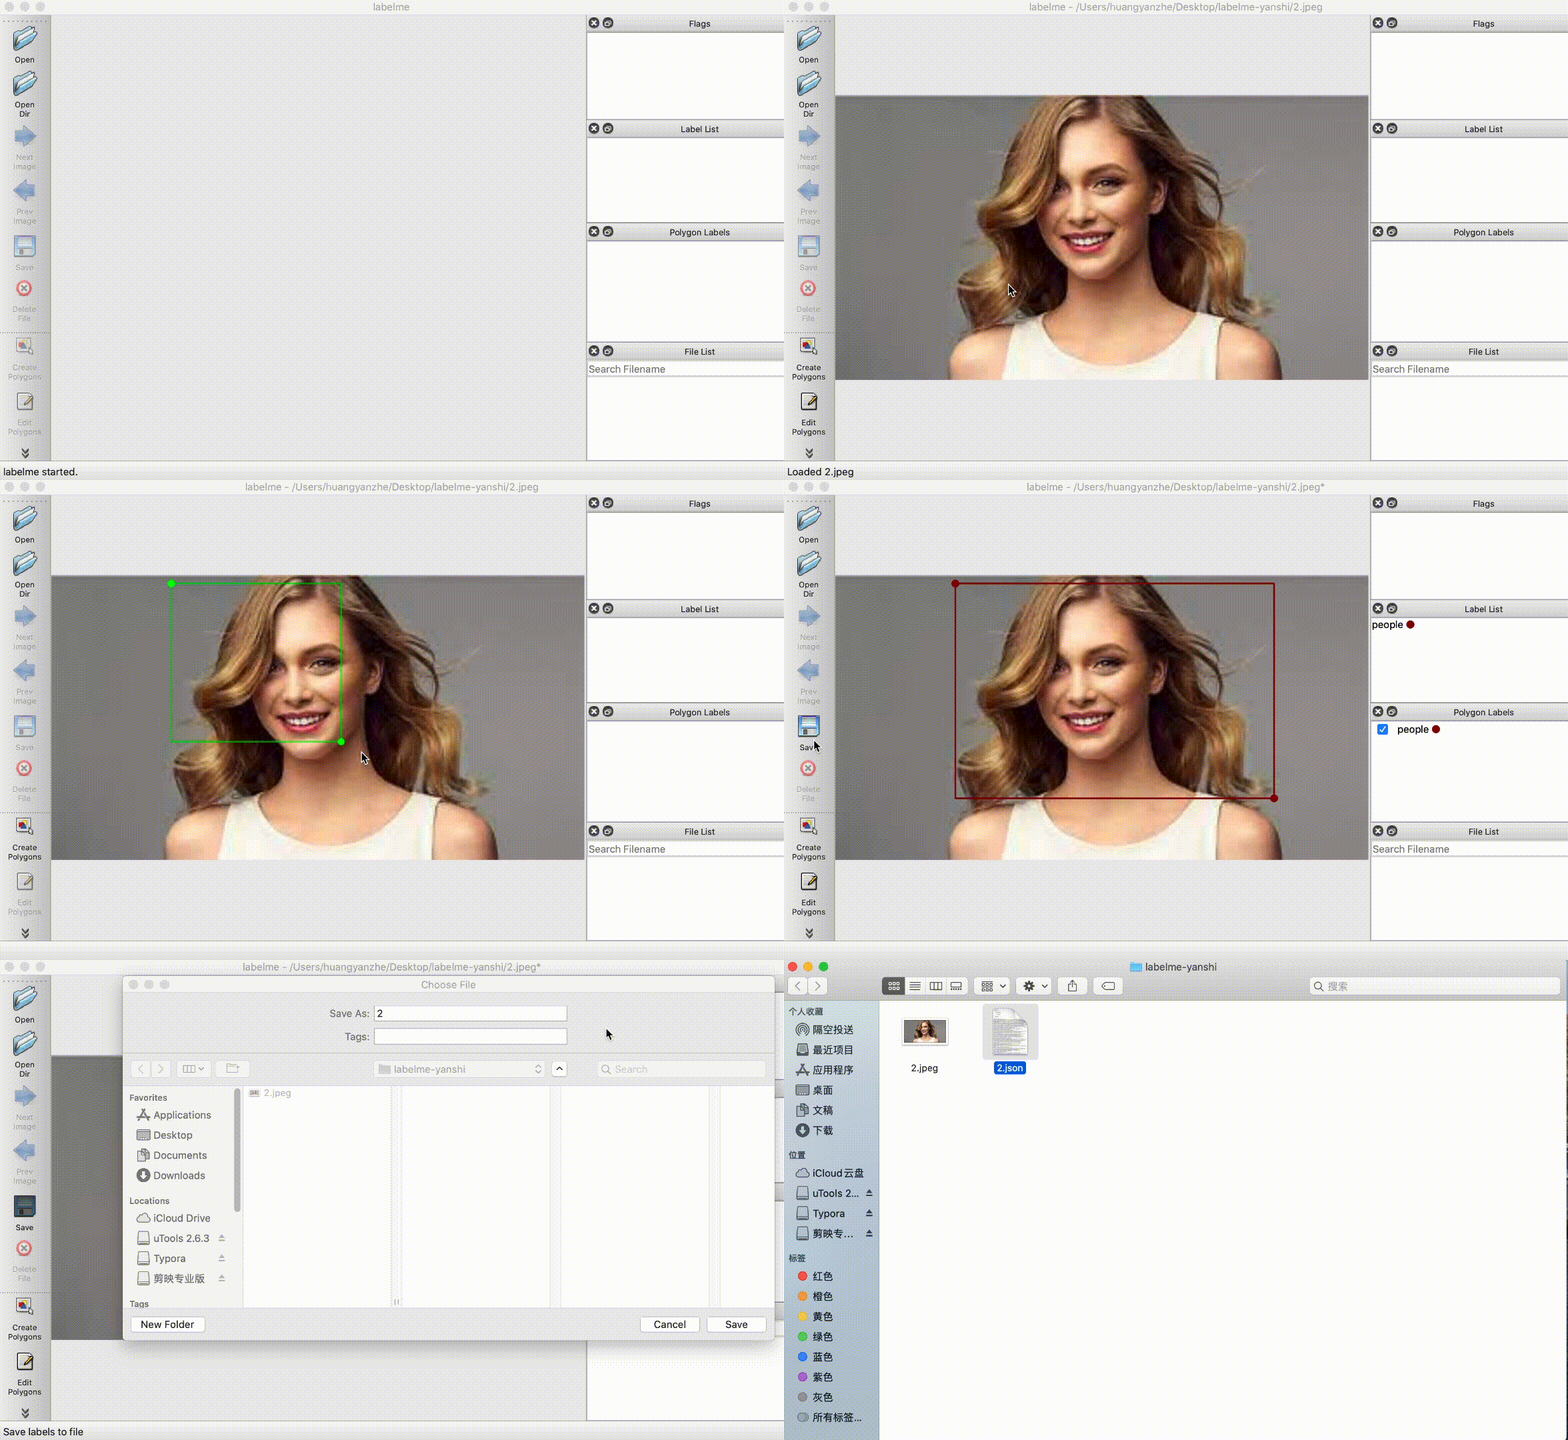
Select `create polygons` in the formula bar. Draw an annotation area as shown in the following GIF. You can right-click on the image to select different shape. When finished, press the Enter/Return key, then fill the corresponding label in the popup box, such as, people.
Click the save button in the formula bar,it will generate an annotation file in json.

### Annotation Format of LabelMe
#### Export Format of LabelMe
```
#generate an annotation file
png/jpeg/jpg-->labelme-->json
```
#### Summary of Format Conversion
```
#convert annotation file to VOC dataset format
json-->labelme2voc.py-->VOC dataset
#convert annotation file to COCO dataset format
json-->labelme2coco.py-->COCO dataset
```
#### Annotation file(json)—>VOC Dataset
Use this script [labelme2voc.py](https://github.com/wkentaro/labelme/blob/main/examples/bbox_detection/labelme2voc.py) in command line.
```Te
python labelme2voc.py data_annotated(annotation folder) data_dataset_voc(output folder) --labels labels.txt
```
Then, it will generate following contents:
```
# It generates:
# - data_dataset_voc/JPEGImages
# - data_dataset_voc/Annotations
# - data_dataset_voc/AnnotationsVisualization
```
#### Annotation file(json)—>COCO Dataset
Convert the data annotated by LabelMe to COCO dataset by the script [x2coco.py](https://github.com/PaddlePaddle/PaddleDetection/blob/release/2.5/tools/x2coco.py) provided by PaddleDetection.
```bash
python tools/x2coco.py \
--dataset_type labelme \
--json_input_dir ./labelme_annos/ \
--image_input_dir ./labelme_imgs/ \
--output_dir ./cocome/ \
--train_proportion 0.8 \
--val_proportion 0.2 \
--test_proportion 0.0
```
After the user dataset is converted to COCO data, the directory structure is as follows (Try to avoid use Chinese for the path name in case of errors caused by Chinese coding problems):
```
dataset/xxx/
├── annotations
│ ├── train.json # Annotation file of coco data
│ ├── valid.json # Annotation file of coco data
├── images
│ ├── xxx1.jpg
│ ├── xxx2.jpg
│ ├── xxx3.jpg
│ | ...
...
```
## [LabelImg](https://github.com/tzutalin/labelImg)
### Instruction
#### Installation of LabelImg
Please refer to [The github of LabelImg](https://github.com/tzutalin/labelImg) for installation details.
Ubuntu
```
sudo apt-get install pyqt5-dev-tools
sudo pip3 install -r requirements/requirements-linux-python3.txt
make qt5py3
python3 labelImg.py
python3 labelImg.py [IMAGE_PATH] [PRE-DEFINED CLASS FILE]
```
macOS
```
brew install qt # Install qt-5.x.x by Homebrew
brew install libxml2
or using pip
pip3 install pyqt5 lxml # Install qt and lxml by pip
make qt5py3
python3 labelImg.py
python3 labelImg.py [IMAGE_PATH] [PRE-DEFINED CLASS FILE]
```
We recommend installing by Anoncanda.
Download and go to the folder of [labelImg](https://github.com/tzutalin/labelImg#labelimg)
```
conda install pyqt=5
conda install -c anaconda lxml
pyrcc5 -o libs/resources.py resources.qrc
python labelImg.py
python labelImg.py [IMAGE_PATH] [PRE-DEFINED CLASS FILE]
```
#### Installation Notes
Use python scripts to startup LabelImg: `python labelImg.py `
#### Annotation of images in LabelImg
After the startup of LabelImg, select an image or a folder with images.
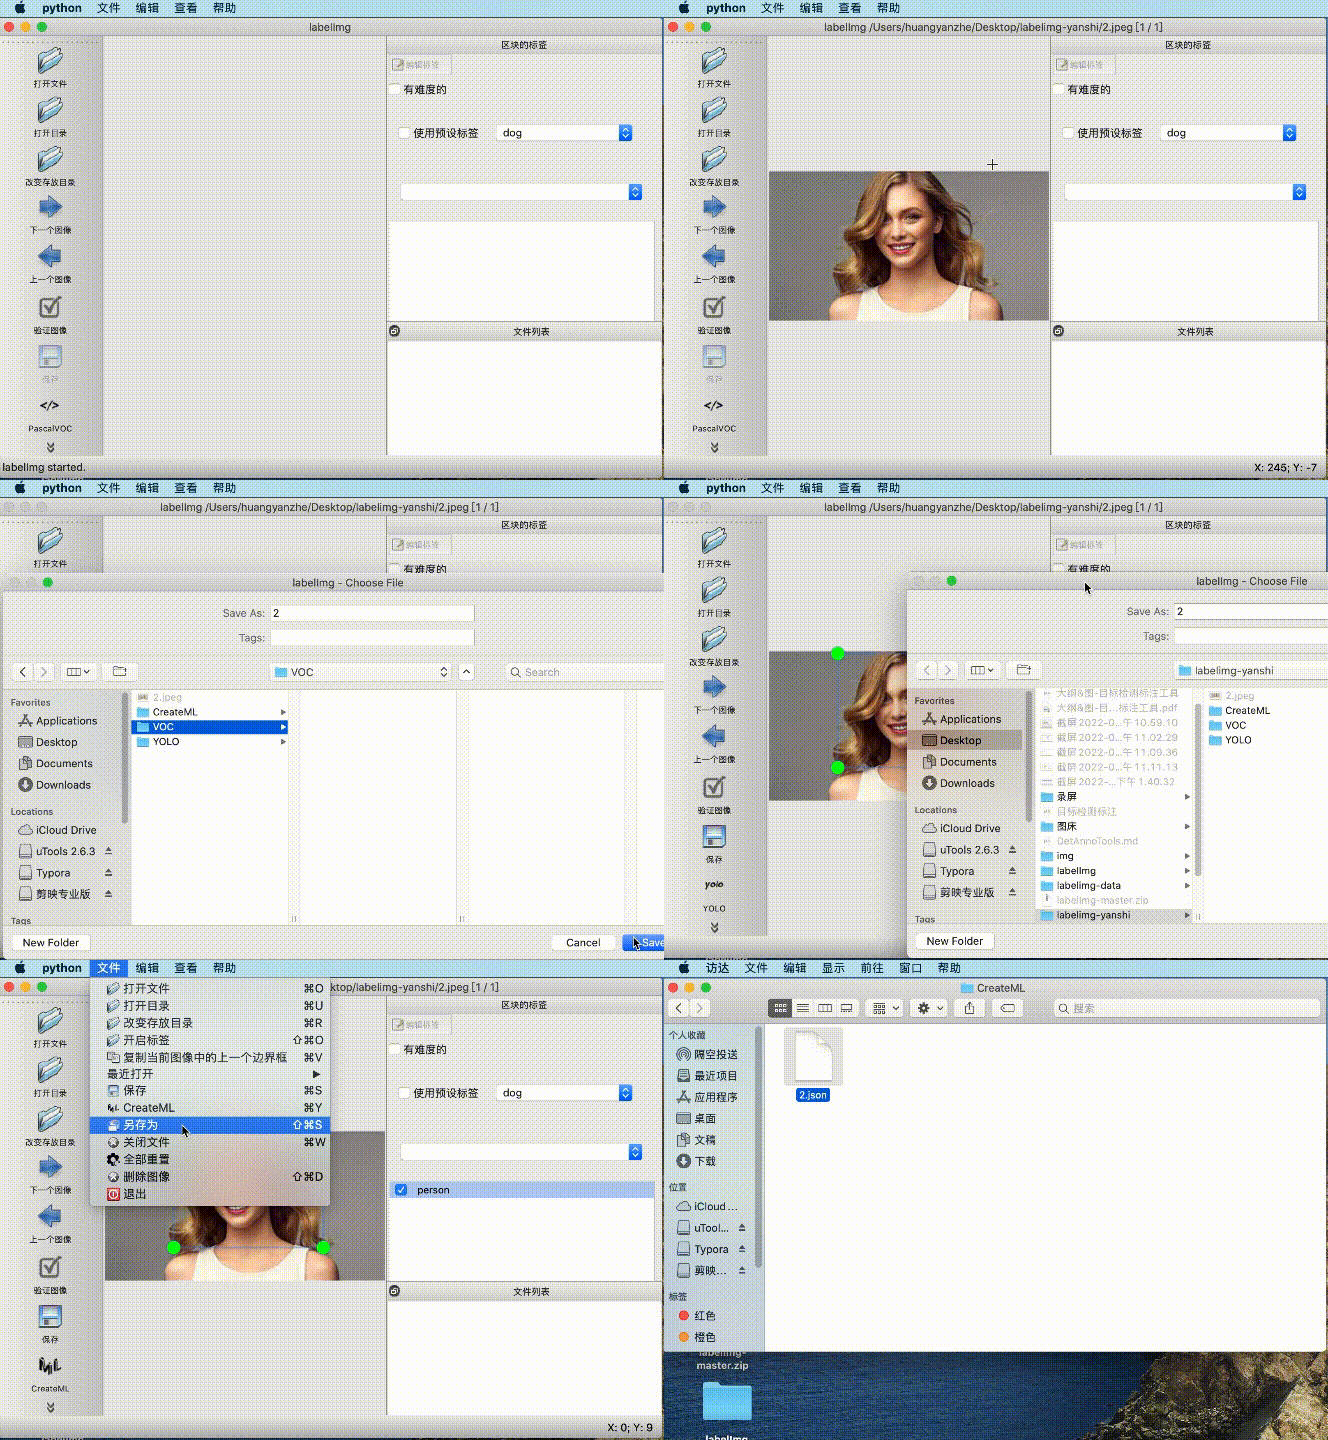
Select `Create RectBox` in the formula bar. Draw an annotation area as shown in the following GIF. When finished, select corresponding label in the popup box. Then save the annotated file in three forms: VOC/YOLO/CreateML.

### Annotation Format of LabelImg
#### Export Format of LabelImg
```
#generate annotation files
png/jpeg/jpg-->labelImg-->xml/txt/json
```
#### Notes of Format Conversion
**PaddleDetection supports the format of VOC or COCO.** The annotation file generated by LabelImg needs to be converted by VOC or COCO. You can refer to [PrepareDataSet](./PrepareDataSet.md#%E5%87%86%E5%A4%87%E8%AE%AD%E7%BB%83%E6%95%B0%E6%8D%AE).