# Getting Started with eTS in the Low-Code Approach
>  **Note:**
> This feature is supported in DevEco Studio V3.0 Beta3 and later versions.
>
> The component lineup that supports low-code development in eTS is now at its preliminary stage and will be expanding in coming versions.
>
> For best possible results, use [DevEco Studio V3.0.0.900 Beta3](https://developer.harmonyos.com/cn/develop/deveco-studio#download_beta_openharmony) for your development.
On the OpenHarmony low-code development pages, you can design your application UI in an efficient, intuitive manner, with a wide array of UI editing features.
You can develop applications or services in the low-code approach using either of the following methods:
- Create a project that supports low-code development. This method is used as an example in this topic.
- In an existing project, create a .visual file for development.
## Creating a Project That Supports Low-Code Development
1. Open DevEco Studio, choose **File** > **New** > **Create Project**, select **Empty Ability**, and click **Next**.

2. Go to the project configuration page, select **Enable Super Visual**, set **UI Syntax** to **eTS**, and retain the default values for other parameters.

3. Click **Finish**. DevEco Studio will automatically generate the sample code and resources that match your project type. Wait until the project is created.
## Low-code Project Files
After the project synchronization is complete, a low-code directory structure is automatically generated in the project, as shown below.

- **entry > src > main > ets > MainAbility > pages > index.ets**: defines logical relationships, such as data and events, used on low-code pages. For details, see [About Syntactic Sugar](../ui/ts-syntactic-sugar.md). If multiple low-code development pages are created, a page folder and the corresponding **.ets** file will be created for each of these pages.
- **entry > src > main > supervisual > MainAbility > pages > index.visual**: stores the data model of the low-code development page. You can double-click the file to open the low-code development page. If multiple low-code development pages are created, a page folder and the corresponding **.visual** file will be created for each of these pages.
## Building the First Page
After the project synchronization is complete, the default first page contains the **Column** and **Text** (**Hello World**) components. To better understand low-code development, we'll delete these template components from the canvas and set the page from scratch.
Add **Column**, **Text**, and **Button** components to the first page. A column is a container component whose child components are vertically arranged. For details, see [Column](../reference/arkui-ts/ts-container-column.md).
1. Delete the existing template components from the canvas.
Open the index.visual file, right-click the existing template components on the canvas, and choose **Delete** from the shortcut menu to delete them. Below is an illustration of the operations.
2. Add a **Column** component and set its styles and attributes.
Drag the **Column** component from the **UI Control** area to the canvas. In the **Attributes & Styles** area on the right, click **General** and set **Height** to **100%** so that the component fills the entire screen. Click **Feature** and set **AlignItems** to **center** so that the child components of the **Column** component are centered along the horizontal axis. Below is an illustration of the operations.
3. Add a **Text** component.
Drag the **Text** component from the **UI Control** area to the canvas and then to the center area of the **Column** component. In the **Attributes & Styles** area, click **Feature**, set **Content** of the **Text** component to **this.message** (that is, **Hello World**), set **FontSize** to **30fp**, and set **TextAlign** to **center**. Then, select the **Text** component on the canvas and drag its corners to fully display the text. Below is an illustration of the operations.

4. Add a **Button** component.
Drag the **Button** component from the **UI Control** area to the canvas and then to a position under the **Text** component. In the **Attributes & Styles** area on the right, click **General** and set **Height** of the **Button** component to **40vp**. Click **Feature** and set **Label** to **Next** and **FontSize** to **25fp**. Below is an illustration of the operations.

5. On the toolbar in the upper right corner of the editing window, click **Previewer** to open the Previewer. Below is how the first page looks in the Previewer.

## Building the Second Page
1. Create the second page.
In the **Project** window, choose **entry** > **src** > **main** > **ets** > **MainAbility**, right-click the **pages** folder, choose **New** > **Visual**, name the page **second**, and click **Finish**. Below is the structure of the **pages** folder.

2. [Delete the existing template components from the canvas.](#delete_origin_content)
3. [Add a **Column** component and set its styles and attributes.](#add_container)
4. Add a **Text** component.
- In the **second.ets** file, set the message text content to **Hi there**. The sample code is as follows:
```ts
@Entry
@Component
struct Second {
@State message: string = 'Hi there'
/**
* In low-code mode, do not add anything to the build function, as it will be
* overwritten by the content generated by the .visual file in the build phase.
*/
build() {
}
}
```
- Drag the **Text** component to the canvas and then to the center area of the **Column** component. In the **Attributes & Styles** area, click **Feature**, set **Content** of the **Text** component to **this.message** (that is, **Hi there**), set **FontSize** to **30fp**, and set **TextAlign** to **center**. Then, select the **Text** component on the canvas and drag its corners to fully display the text. Below is an illustration of the operations.

5. Add a **Button** component.
Drag the **Button** component from the **UI Control** area to the canvas and then to a position under the **Text** component. In the **Attributes & Styles** area on the right, click **General** and set **Height** of the **Button** component to **40vp**. Click **Feature** and set **Value** to **Back** and **FontSize** to **25fp**. Below is an illustration of the operations.

## Implementing Page Redirection
You can implement page redirection through the page router, which finds the target page based on the page URI. Import the **router** module and then perform the steps below:
1. Implement redirection from the first page to the second page.
In the files of the first page, bind the **onclick** method to the button so that clicking the button redirects the user to the second page. This operation needs to be completed in both .ets and .visual files.
- In the **index.ets** file:
```ts
import router from '@ohos.router';
@Entry
@Component
struct Index {
@State message: string = 'Hello World'
/**
* In low-code mode, do not add anything to the build function, as it will be
* overwritten by the content generated by the .visual file in the build phase.
*/
onclick() {
router.push({
url: 'pages/second', // Specify the page to be redirected to.
})
}
build() {
}
}
```
- In the index.visual file, select the **Button** component on the canvas. In the **Attributes & Styles** area, click **Events** and set **OnClick** to **this.onclick**.

2. Implement redirection from the second page to the first page.
In the files of the second page, bind the **back** method to the **Back** button so that clicking the button redirects the user back to the first page. This operation needs to be completed in both .ets and .visual files.
- In the **second.ets** file:
```ts
import router from '@ohos.router';
@Entry
@Component
struct Second {
@State message: string = 'Hi there'
/**
* In low-code mode, do not add anything to the build function, as it will be
* overwritten by the content generated by the .visual file in the build phase.
*/
back() {
router.back()
}
build() {
}
}
```
- In the second.visual file, select the **Button** component on the canvas. In the **Attributes & Styles** area, click **Events** and set **OnClick** to **this.back**.

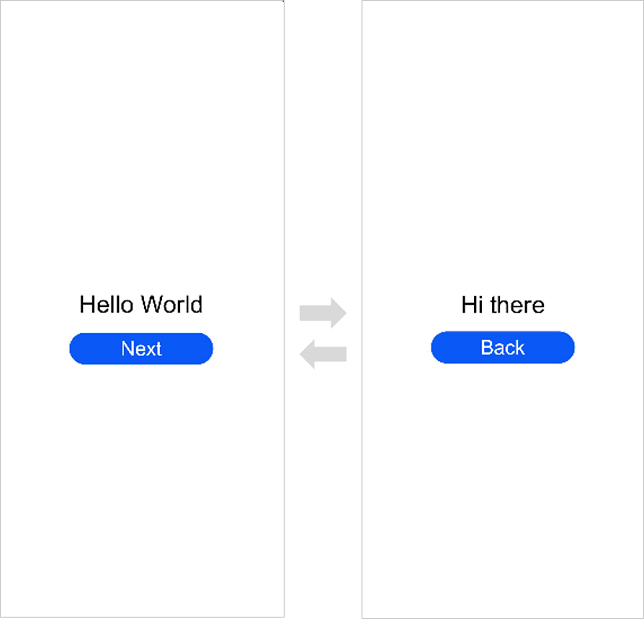
3. Open the **index.visual** or **index.ets** file and click  in the Previewer to refresh the file. The figure below shows the effect.
## Running the Application on a Real Device
1. Connect the development board running the OpenHarmony standard system to the computer.
2. Choose **File** > **Project Structure** > **Project** > **Signing Configs**, select **Automatically generate signing**, wait until the automatic signing is complete, and click **OK**, as shown below.

3. On the toolbar in the upper right corner of the editing window, click . The display effect is shown in the figure below.

Congratulations! You have finished developing your OpenHarmony application in eTS in the low-code approach. To learn more about OpenHarmony, see [OpenHarmony Overview](../application-dev-guide.md).