# Getting Started with JavaScript in the Traditional Coding Approach
>  **Note:**
> For best possible results, use [DevEco Studio V3.0.0.900 Beta3](https://developer.harmonyos.com/cn/develop/deveco-studio#download_beta_openharmony) for your development.
## Creating a JavaScript Project
1. Open DevEco Studio, choose **File** > **New** > **Create Project**, select **Empty Ability**, and click **Next**.

2. On the project configuration page, set **UI Syntax** to **JS** and retain the default values for other parameters.
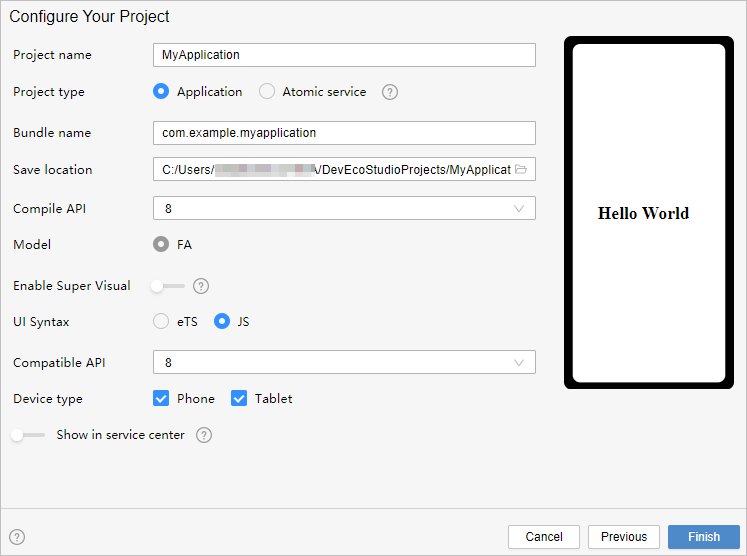
3. Click **Finish**. DevEco Studio will automatically generate the sample code and resources that match your project type. Wait until the project is created.
## JavaScript Project Files
- **entry** : OpenHarmony project module, which can be built into an ability package (HAP).
- **src > main > js** : a collection of JS source code.
- **src > main > js > MainAbility** : entry to your application/service.
- **src > main > js > MainAbility > i18n** : resources in different languages, for example, UI strings and image paths.
- **src > main > js > MainAbility > pages** : pages contained in **MainAbility**.
- **src > main > js > MainAbility > app.js** : ability lifecycle file.
- **src > main > resources** : a collection of resource files used by your application/service, such as graphics, multimedia, character strings, and layout files.
- **src > main > config.json** : module configuration file. This file describes the global configuration information of the application/service, the device-specific configuration information, and the configuration information of the HAP file.
- **build-profile.json5** : module information and build configuration options, including **buildOption target**.
- **hvigorfile.js** : module-level compilation and build task script. You can customize related tasks and code implementation.
- **build-profile.json5** : application-level configuration information, including the signature and product configuration.
- **hvigorfile.js** : application-level compilation and build task script.
## Building the First Page
1. Use the **Text** component.
After the project synchronization is complete, choose **entry** > **src** > **main** > **js** > **MainAbility** > **pages** > **index** in the **Project** window and open the **index.hml** file. You can see that the file contains a **<Text>** component. The sample code in the **index.hml** file is shown below:
```
Hello World
```
2. Add a button and bind the **onclick** method to this button.
On the default page, add an **<input>** component of the button type to accept user clicks and implement redirection to another page. The sample code in the **index.hml** file is shown below:
```
Hello World
```
3. Set the page style in the **index.css** file.
From the **Project** window, choose **entry** > **src** > **main** > **js** > **MainAbility** > **pages** > **index**, open the **index.css** file, and set the page styles, such as the width, height, font size, and spacing. The sample code in the **index.css** file is shown below:
```
.container {
display: flex;
flex-direction: column;
justify-content: center;
align-items: center;
left: 0px;
top: 0px;
width: 100%;
height: 100%;
}
.title {
font-size: 100px;
font-weight: bold;
text-align: center;
width: 100%;
margin: 10px;
}
.btn {
font-size: 60px;
font-weight: bold;
text-align: center;
width: 40%;
height: 5%;
margin-top: 20px;
}
```
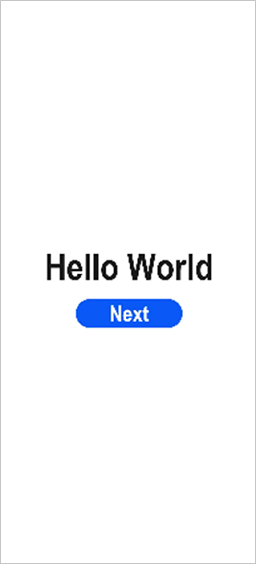
4. On the toolbar in the upper right corner of the editing window, click **Previewer** to open the Previewer. Below is how the first page looks on the Previewer.
## Building the Second Page
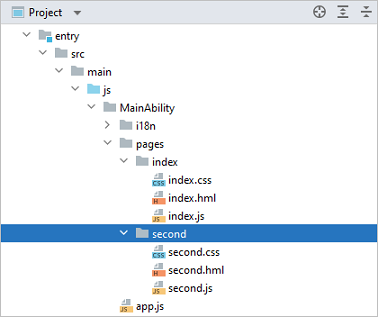
1. Create the second page.
In the **Project** window, choose **entry** > **src** > **main** > **js** > **MainAbility**, right-click the **pages** folder, choose **New** > **Page**, name the page **second**, and click **Finish**. Below is the structure of the **second** folder:
2. Add **<Text>** and **<Button>** components.
Add **<Text>** and **<Button>** components and set their styles, as you do for the first page. The sample code in the **second.hml** file is shown below:
```
Hi there
```
3. Set the page style in the **second.css** file. The sample code in the **second.css** file is shown below:
```
.container {
display: flex;
flex-direction: column;
justify-content: center;
align-items: center;
left: 0px;
top: 0px;
width: 100%;
height: 100%;
}
.title {
font-size: 100px;
font-weight: bold;
text-align: center;
width: 100%;
margin: 10px;
}
.btn {
font-size: 60px;
font-weight: bold;
text-align: center;
width: 40%;
height: 5%;
margin-top: 20px;
}
```
## Implementing Page Redirection
You can implement page redirection through the [page router](../ui/ui-js-building-ui-routes.md), which finds the target page based on the page URI. Import the **router** module and then perform the steps below:
1. Implement redirection from the first page to the second page.
In the **index.js** file of the first page, bind the **onclick** method to the button so that clicking the button redirects the user to the second page. The sample code in the **index.js** file is shown below:
```
import router from '@ohos.router';
export default {
onclick: function () {
router.push({
url: "pages/second/second"
})
}
}
```
2. Implement redirection from the second page to the first page.
In the **second.ets** file of the second page, bind the **back** method to the **Back** button so that clicking the button redirects the user back to the first page. The sample code in the **second.js** file is shown below:
```
import router from '@ohos.router';
export default {
back: function () {
router.back()
}
}
```
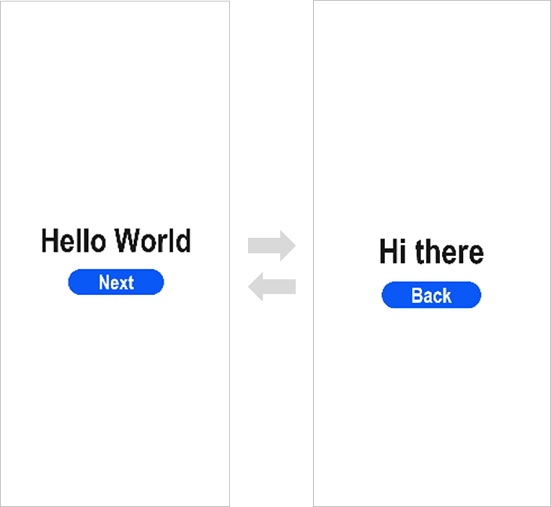
3. Open any file in the **index** folder and click  in the Previewer to refresh the file. The figure below shows the effect.
## Running the Application on a Real Device
1. Connect the development board running the OpenHarmony standard system to the computer.
2. Choose **File** > **Project Structure** > **Project** > **Signing Configs**, select **Automatically generate signing**, wait until the automatic signing is complete, and click **OK**, as shown below.

3. On the toolbar in the upper right corner of the editing window, click . The display effect is shown in the figure below.

Congratulations! You have finished developing your OpenHarmony application in JavaScript in the traditional coding approach. To learn more about OpenHarmony, see [OpenHarmony Overview](../application-dev-guide.md)