# Configuring the OpenHarmony SDK
To set up the OpenHarmony app development environment, configure the corresponding SDK information in DevEco Studio first.
> **NOTE:**
>The OpenHarmony SDK is not applicable to HarmonyOS app development, with some necessary toolchains removed.
## Prerequisites
[DevEco Studio 3.0 Beta1](https://developer.harmonyos.com/cn/develop/deveco-studio#download) or later has been downloaded and installed.
## Configuring the SDK Information
DevEco Studio manages SDKs and toolchains using SDK Manager. OpenHarmony contains the following SDK packages:
Type
Package Name
Description
SDK
JS
SDK for JS.
SDK Tool
Toolchains
Includes compiling, packaging, signing, database management, and other tools that are required to develop OpenHarmony apps.
Previewer
OpenHarmony app previewer, which can be used to view the UI layout during app development.
1. Open DevEco Studio. If this is the first time you are using it, select **Do not import settings** and click **OK**.
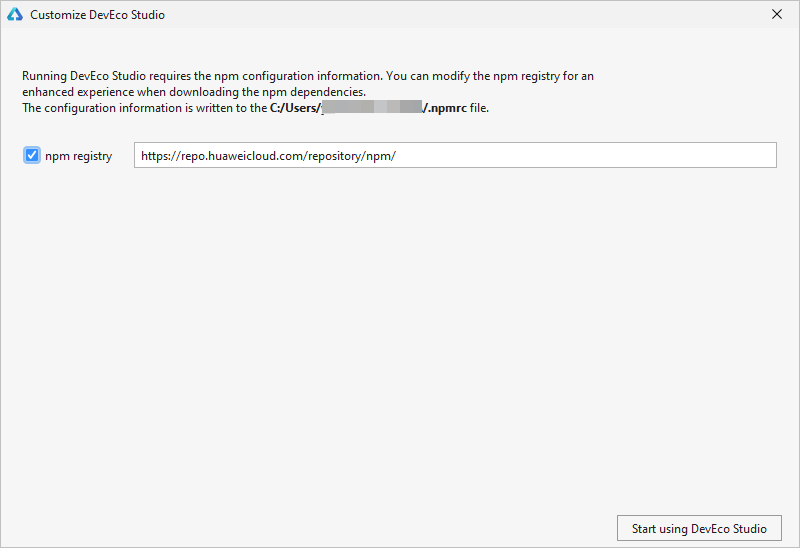
2. Follow the wizard to set **npm registry**. DevEco Studio has been preconfigured with the corresponding registry. Click **Start using DevEco Studio** to go to the next step.
> **NOTE:**
>If the **Set up HTTP Proxy** page is displayed, it indicates that your network requires a proxy. In this case, set up the DevEco Studio proxy, npm proxy, and Gradle proxy according to [References](#section0384143616409), and then download the OpenHarmony SDK.
3. Follow the wizard to download the SDK. By default, the OpenHarmony SDK will be downloaded. You can download the SDK to the default **user** directory or a local path that does not contain any Chinese characters. Then click **Next**.

> **NOTE:**
>If you are not using DevEco Studio for the first time, the SDK download page may not be displayed. In this case, go to **Configure** \(or \) \> **Settings** \> **SDK Manager** \> **OpenHarmony SDK** and click **OpenHarmony SDK Location** to download the SDK.
4. On the **Settings Confirmation** page, click **Next**. When the **License Agreement** dialog box appears, click **Accept**.
> **NOTE:**
>If the message "Install js dependencies failed." is displayed during SDK download, follow the FAQ about the [JS SDK Installation Failure](https://developer.harmonyos.com/en/docs/documentation/doc-guides/faq-development-environment-0000001168829643#section1311117111474) to troubleshoot.

5. After the OpenHarmony SDK and tools are downloaded, click **Finish** to access the DevEco Studio welcome page.

## References
Setting up the development environment requires that your network can directly access the Internet.
Generally, only some enterprise networks rather than personal area networks or home networks require a proxy to access the Internet.
If you are using DevEco Studio for the first time and the **Set up HTTP Proxy** page is displayed, it indicates that your network requires a proxy. In this case, set up the DevEco Studio proxy, npm proxy, and Gradle proxy.

### Setting Up the DevEco Studio Proxy
1. Start DevEco Studio. On the **Set up HTTP Proxy** page that is displayed, select **Manual proxy configuration** and set the HTTP proxy.
> **NOTE:**
>If this is not the first time you are using DevEco Studio:
>- On the welcome page, choose **Configure** \(or the  icon\) \> **Settings** \> **Appearance & Behavior** \> **System Settings** \> **HTTP Proxy** to access the HTTP proxy settings. \(For macOS, choose **Configure** \> **Preferences** \> **Appearance & Behavior** \> **System Settings** \> **HTTP Proxy**.\)
>- When on a project page, choose **File** \> **Settings** \> **Appearance & Behavior** \> **System Settings** \> **HTTP Proxy** to access the HTTP proxy settings. \(For macOS, choose **DevEco Studio** \> **Preferences** \> **Appearance & Behavior** \> **System Settings** \> ** HTTP Proxy**.\)
- **HTTP** parameters: **If you are not sure about the information, contact your network administrator.**
- **Host name**: Enter the host name or IP address of the proxy server.
- **Port number**: Enter the port number of the proxy server.
- **No proxy for**: Enter the URLs or IP addresses which the PC can directly connect to without a proxy server. Use commas \(,\) to separate URLs and IP addresses.
- **Proxy authentication** parameters: Set the parameters only when the proxy server requires authentication.
- **Login**: Enter the user name used to access the proxy server.
- **Password**: Enter the password used to access the proxy server.
- **Remember**: Select this option to remember the password.

2. When you have finished, click **Check connection** and enter a URL \(for example, **https://developer.harmonyos.com**\) to check the network connectivity. If the message "Connection successful" is displayed, it indicates that the proxy was set up successfully.
3. Click **Next: Configure npm** to set up the npm proxy. For details, see [Setting Up the npm Proxy](#section19984059114316).
### Setting Up the npm Proxy
Follow the configuration wizard of DevEco Studio to configure the npm proxy information, which will be written into the **.npmrc** file in the **users/**_user name_ directory.
> **NOTE:**
>The configuration wizard is displayed only the first time you install DevEco Studio. If the wizard is not displayed, manually add the proxy information to the **.npmrc** file in the **users/**_user name_ directory.
- **npm registry**: Set the address of the npm registry. You are advised to select this option.
- **HTTP proxy**: Proxy server information. By default, the value is the same as that of **HTTP proxy** of DevEco Studio.
- **Enable Https Proxy**: Indicates whether to configure HTTPS proxy. You are advised to select this option.

Click **Start using DevEco Studio**.
If your proxy server requires the user name and password for authentication, set the user name and password as follows. If your proxy server does not require authentication, skip this step and follow the instructions in [Configuring the SDK Information](#section1265592425017).

1. Go to the **Users** directory and open the **.npmrc** file.
2. Modify the npm proxy information. Add the **user** and **password** fields to **proxy** and **https-proxy**. Note that the values may vary depending on the proxy. The following is an example:
```
proxy=http://user:password@proxy.server.com:80
https-proxy=http://user:password@proxy.server.com:80
```
> **NOTE:**
>If the password contains special characters, such as @, \#, and \*, the configuration may not take effect. You are advised to replace the special characters with ASCII codes and add "%" before the ASCII codes. Refer to the following for the mapping between common symbols and ASCII codes.
>- !: %21
>- @: %40
>- \#: %23
>- ¥: %24
>- &: %26
>- \*: %2A
3. After the proxy is configured, open the CLI and run the following command to check whether the network is normal.
```
npm info express
```
If the following information is displayed after running the command, it indicates that the proxy has been set up successfully.

4. When you are done, follow the instructions in [Configuring the SDK Information](#section1265592425017).
### Setting up the Gradle Proxy
1. Open **This PC**, and enter **%userprofile%** in the address box to access the user profile. \(For macOS, choose **Go** \> **Home**.\)

2. Create a **.gradle.** folder if there is none.
> **NOTE:**
>Before creating a **.gradle** folder in macOS, set the system to show hidden files.
3. Open the **.gradle** folder, create a **gradle** file, and change the file name extension to .properties.
4. Add the following script to the **gradle.properties** file and save the file:
Modify the host name, port number, user name, password, and proxy exceptions \(**nonProxyHosts**\) based on the actual condition. Separate values for **nonProxyHosts** with a vertical bar \(|\).
```
systemProp.http.proxyHost=proxy.server.com
systemProp.http.proxyPort=8080
systemProp.http.nonProxyHosts=*.company.com|10.*|100.*
systemProp.http.proxyUser=userId
systemProp.http.proxyPassword=password
systemProp.https.proxyHost=proxy.server.com
systemProp.https.proxyPort=8080
systemProp.https.nonProxyHosts=*.company.com|10.*|100.*
systemProp.https.proxyUser=userId
systemProp.https.proxyPassword=password
```